Into the Cave: The Setup and Story
To carry that warm, torchlit opening forward, let’s frame the game world you and your partner will inhabit.
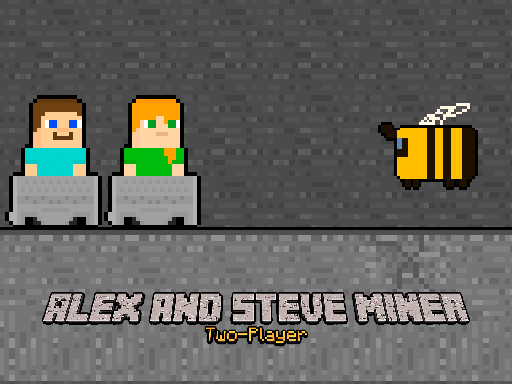
Premise
Alex and Steve stumble into a cave by accident. The objective is simple but tense: work together to navigate rooms, flip valves, push boxes, avoid hazards, and reach the daylight exit. The game asks for cooperation—one player may pull a valve while the other holds a platform, for example—so two brains beat one for clever puzzles. Have you ever noticed how games like this reward a whisper of planning before a frantic dash? It’s that tiny planning window that makes teamwork meaningful.
Why it grips you
The cave’s atmosphere is tactile: damp stone, echoing drips, and silhouettes of stalactites. These sensory details make every small success feel dramatic—when a valve clicks open or a heavy box slides into place, you both breathe out like you’ve finished a tiny, shared symphony. I remember a friend slapping the keyboard in delight when we rescued a trapped Alex from a sinking ledge; our laughter echoed like the cave’s own applause. The staging matters: this isn’t just puzzle logic; it’s a short, emotional story you act out together. Next we’ll unpack the controls and the core mechanics you’ll use to choreograph those moments.
Controls & Core Mechanics
Picking up from the story and atmosphere, let’s get practical: how do Alex and Steve actually move and interact?
Movement Basics
Each player controls their character: Alex uses WASD and Steve uses the Arrow keys. Movement is deliberately tactile—walk, sprint (a short press or toggle, depending on build), and crouch to slide under low passages. The game usually requires sequence movement—moving in a particular order or timing—to pass some levels; for example, one player may need to stand on a pressure plate before the other crosses. Have you ever tried to coordinate two characters on one keyboard? There’s a small art to sharing space and timing your steps so your hands don’t tangle.
Interaction Keys
The interaction keys are simple but powerful. Press E to grab and push boxes—boxes that form bridges, weigh down switches, or block hazards. Hold L to open valves; valves are time-based and often need simultaneous actions (one player holds L while the other secures a gate). These mechanics create cooperative choreography: one player might hold the valve (counting the beats) while the other shimmies a box into position. Little dialogues happen naturally:
“Hold L now.”
“Okay… holding—three…two—”
“Push the box forward!”
Those lines are how the game becomes a duet. Next we’ll walk through your first level, step by step, so you can experience that duet for yourself.
First Steps: Playing Your Initial Level
Carrying your grasp of controls into actual play, this section walks you through your inaugural level with clear steps.
Initial setup
Before pressing a key, agree with your partner on roles: who will focus on platforming (precision movement), and who will focus on object manipulation (E and L). Set up your station so both players can see the screen and reach keys comfortably. Start by scanning the room: where are the boxes, valves, pressure plates, and hazards? A three-second visual map reduces the chaotic “both press everything” approach. I like to call that the “two-second planning” rule—pause, point, and assign. Ask: “Which valve needs holding? Who’ll push the box?” Simple talk equals fewer do-overs.
Walkthrough: first puzzle
Commonly, the first room introduces sequence logic: a valve raises a gate for 5 seconds, a box must be pushed to form a bridge, and a pressure plate keeps a door open. Step-by-step: (1) Player A positions the box near the pit but doesn’t push it yet. (2) Player B stands on the pressure plate to prevent the gate from closing. (3) Player A pushes the box into place using E while B times the valve with L. (4) As the gate opens, B runs across the box bridge and toggles the next switch while A follows. If you mess up, that’s okay—those early failures teach the rhythm. One kid I coached laughed through three retries before nailing it; their grin after the final switch clicked was worth every misstep. Next, we’ll expand those basics into cooperative strategies so your team feels like a well-oiled rescue crew.
Cooperative Strategies: Roles, Communication, and Rhythm
Building on the first-level steps, here are deeper strategies to make Alex and Steve a coordinated duo rather than two solo players.
Assigning roles
Divide responsibilities dynamically. One player (the “Mover”) focuses on platforming: timing jumps, balancing on narrow beams, and navigating hazards. The other (the “Manipulator”) concentrates on objects: grabbing boxes, holding valves, and flipping switches. Roles can swap mid-level if a puzzle calls for different strengths. For example, when a box needs shimmying while a platform tilts, the Mover becomes the spotter and the Manipulator becomes the primary actor. A simple line like “You’re Manipulator, I’ll watch the path” prevents the common two-people-pushing-the-box chaos.
Communication shortcuts
Develop a small lexicon of quick calls: “Valve—hold!”, “Push—now!”, “On plate!”, “Reset!”. These reduce chatter and speed up coordination. Use countdowns for synchronized actions: “Three—two—push!” or “Hold L—three—two—go!” For younger players, encourage expressive calls—“Big push!”—which are fun and unambiguous. Here’s a short list of high-value calls to memorize:
- “Valve hold”
- “Push now”
- “On plate”
- “Path left/right”
- “Reset”
Those five phrases will shave seconds off tricky sequences. Mini-dialogue example:
Alex: “Valve hold—three!”
Steve: “Holding—one—push!”
Alex: “Nice! Move left!”
That rhythm becomes the heart of cooperative flow. Up next: advanced maneuvers for valves, boxes, and timed sequences.
Advanced Gameplay: Valves, Boxes, and Sequence Mastery
Now that you have roles and rhythm, here are advanced tips for complex puzzles—valves that reset, boxes that need momentum, and sequences that require exact timing.
Valve mechanics and timing
Valves often operate on a countdown; once you release L, the valve slowly reverses. For challenging puzzles, coordinate so one player holds L to prime a mechanism while the other performs a delicate maneuver. For example, if a valve opens a gate for 7 seconds but the path requires pushing a box halfway then making a precision jump, use staggered timing: hold the valve, start the push early, and time the jump to land as the gate reaches full open. A useful trick is to “lead” the action: begin moving the box slightly before the valve reaches full open so the final shove is a short corrective action. If you and your partner whisper a one-second cadence—“ready, set, go”—you’ll find the rhythm intuitive.
Box physics and momentum
Boxes have weight and sometimes slide if pushed on slopes. When you need the box to move smoothly, push from the top edge and maintain steady pressure with E. If a box must be dropped precisely into a recess, line it up from a higher vantage point and nudge gently. For puzzles requiring momentum (e.g., push box to roll it through a gap), build speed by taking a short run-up—this is where the Mover’s platforming helps: they clear the path while the Manipulator prepares the push. Pro tip: if a box is stuck, back it up a bit and approach at a different angle; game physics often allow repositioning for a cleaner shove. Next we’ll explore how to coach children and how parents can make these moments teachable.
Tips for Parents and Children: Learning Through Play
Having mastered mechanics and advanced tricks, let’s focus on the human side—how parents can guide kids without hogging the keyboard, and how children can learn team skills through play.
Scaffolding play, not taking over
The golden rule: guide, don’t commandeer. Ask questions that nudge rather than solve. Instead of saying “Press L now,” try “What happens if you hold that valve for two beats?” This encourages prediction and reflection. Offer small hints: “Maybe the box needs to line up with that notch first.” When frustration rises (common with tricky sequences), suggest a short break or a “practice the part” drill—replay only the segment that stumps them, not the entire level. Children learn more from grappling with challenges than from watching an adult clear them in one sweep.
Teachable moments and transferable skills
This game is rich in educational value: sequencing (do A before B), spatial planning (where will the box fit?), teamwork, and timing. Turn each replay into a micro-lesson: “You waited until the valve opened all the way—smart!” or “Remember, two steps forward, one step back to re-set.” Use mini-dialogues for encouragement:
Parent: “You almost timed that jump—want to try a slow practice?”
Child: “Yes! I’ll count with you.”
These small interactions teach metacognition—thinking about thinking—which is huge for developing learners. Up next we’ll troubleshoot the common obstacles you’ll meet and how to beat them without breaking your keyboard (or patience).
Common Obstacles & How to Overcome Them
Building from coaching and practice, we’ll now map the typical traps players hit and concrete ways to get past them.
Timing traps and mis-synced moves
One frequent failure mode is poor synchronization: one player releases a valve too soon or pushes a box before the partner secures the path. Counter this with a strict cadence: use verbal countdowns (“Three—two—push!”) and, if available, rely on visual signals—character flinches or valve animations—to cue the action. If you keep failing at the same spot, slow down and turn the sequence into a micro-puzzle: repeat only those frames until you and your partner can perform them without thinking.
Environmental hazards and surprise traps
Caves often hide one-way drops, collapsible floors, and surprise rockfalls. To avoid panic, adopt a “spot and shout” rule: the player who sees a hazard first says its location immediately—“Rock above!”—so the other player can brace. When dealing with one-way drops, prioritize securing boxes or activating switches that create a return path. For moving hazards, watch their pattern two full cycles before committing. I once had a pair who, after twenty-odd deaths by the same falling boulder, finally timed it by whistling a three-beat rhythm; on the twentieth retry they made it, and the whoop echoed like a small theater of triumph. Next, we’ll turn those retries into efficient practice routines.
Practice Routines & Training Drills
After surviving obstacles, it helps to structure practice. These drills turn flailing attempts into targeted improvement.
Segment practice and repetition
Break levels into bite-sized segments—valve room, bridge room, piston corridor. Practice each until success three times in a row. This reduces cognitive load and builds muscle memory. Use “checkpointing” in your head: after passing segment A, pause and reaffirm the next plan. That tiny ritual—exhale, point, go—anchors focus.
Speed, accuracy, and reaction drills
Work on reaction timing with drills like:
- Valve hold dribble: practice holding L for increasing durations (2s, 3s, 5s).
- Box alignment: push boxes into tighter recesses from varying angles.
- Split-second jump: one player stands on a marked tile; the other times jumps to land precisely on it.
Below is a handy table summarizing drills, benefits, and practice tips.
| Drill | Skills Developed | How to Practice |
|---|---|---|
| Valve Hold Variation | Timing, patience | Hold L for increasing durations; swap roles |
| Box Precision Push | Spatial alignment | Push boxes into recesses from different angles |
| Synchronized Push | Communication, rhythm | Countdown actions then execute together |
| Segment Replay | Focused learning | Repeat only the tricky segment until 3/3 success |
| Reaction Jumps | Reflexes | Drill short jump windows with variable delays |
Short practice sessions (10–15 minutes) beat long, unfocused grinding. After drills, celebrate little wins—a highfive or silly victory pose keeps morale high. Next we’ll wrap up with final encouragements, platform notes, and resources.
Wrap-Up: Celebrations, Platforms & Next Steps
Bringing our cave chat full circle, let’s celebrate what you’ve learned and point to where you can play and dig deeper.
Celebrating the small victories
The real reward in helping Alex and Steve escape isn’t just the light at the cave mouth—it’s the shared laughter when a difficult valve finally clicks, the tiny triumphant fist bumps, the remembered line: “We did it together.” Keep a log of “firsts”: first successful synchronized push, first box-bridge cleared, or first valve held without error. Those micro-trophies tell a story of progress, not perfection.
Where to play and further resources
This cooperative cave format appears across indie platforms and teaching tools; check popular indie portals (itch.io), browser game collections, or your favorite app store for similar titles. For background on cooperative gameplay and why it builds social skills, see the cooperative video game overview on Wikipedia: https://en.wikipedia.org/wiki/Cooperative_video_game — it’s a trustworthy introduction to the design principles behind games like this. If you want printable practice sheets, I can make a one-page “valve & box drill card” to tape near your keyboard.
If you’re curious, what would you and your partner name your team—“Torch Twins,” “Valve Masters,” or something delightfully ridiculous? Next, I can draft a printable walkthrough for your first five rooms or a kid-friendly coaching sheet—tell me which and I’ll make it.
For Your Social
#CaveEscape #AlexAndSteve #CoopGaming #ParentChildPlay #PuzzlePlatformer #TeamworkPlays #IndieGameTips