The Ultimate Guide to “Little Tailor DIY Fashion”
Introduction: Step Into the World of Fashion
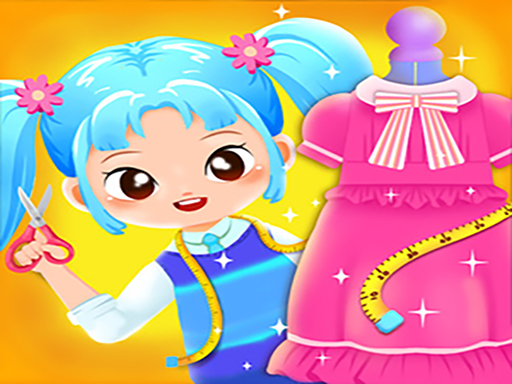
Meet Your Mini Boutique
Imagine walking into a colorful little workshop filled with fabrics, patterns, and sparkling stickers. Sunlight streams through the window, catching threads of gold and pastel hues. “Today, I’m going to make the cutest outfits in town!” you whisper, ready to play Little Tailor DIY Fashion.
This game isn’t just about dressing dolls—it’s an imaginative journey where anyone can step into the shoes of a fashion designer. Whether designing for a stylish boy or a trendy girl, every outfit is a canvas for creativity. The simple point-and-click mechanics make it accessible to children and casual gamers, while the layered customization keeps it engaging. Have you ever noticed how adding a tiny bow can completely change the mood of an outfit? That’s the magic of this game.
Why Players Are Hooked
The appeal goes beyond cute characters and colorful fabrics. Children learn sequencing, color coordination, and spatial thinking while enjoying playful creativity. Adults or casual gamers appreciate the stress-free environment to experiment with styles and create visually appealing designs. Each outfit crafted is a tiny story—a snapshot of creativity expressed through fashion.
Transition: Understanding the charm of the game is just the beginning. Let’s dive into gameplay mechanics, controls, and objectives to see how you can design with flair.
Gameplay Mechanics: Controls and Objectives
Simple Controls for Effortless Creativity
Little Tailor DIY Fashion is designed for intuitive gameplay:
Mouse: Click to select fabrics, stickers, and patterns, and drag items onto clothing pieces.
Touch Devices: Tap to select and position elements, making it easy for children and casual gamers.
Have you ever tried layering stickers over a dress and paused, wondering if a bow or flower looks better? That’s part of the fun—the game encourages experimentation while keeping mechanics simple.
Core Objectives
The main objective is to design adorable outfits and capture them in stylish photos:
Design Outfits: Follow instructions or freestyle to create garments for boys and girls.
Add Decorations: Apply stickers, patterns, or embellishments to elevate your design.
Pose and Photograph: Position the characters and select frames for photos, turning your creations into keepsakes.
Each step combines creativity with decision-making, rewarding players with a sense of accomplishment and fun.
Transition: Now that you know the mechanics, let’s explore step-by-step strategies for different players.
Step-by-Step Strategies for Players
Strategies for Young Designers
- Follow Instructions: Beginners benefit from the guided tutorials before experimenting.
- Mix Colors and Patterns: Learn how contrasting or complementary colors work.
- Experiment Freely: Try layering stickers and patterns for unique designs.
Little Emma once said, “I didn’t know a dress could look so magical with just a few stars!” Trial-and-error encourages creativity without fear of mistakes.
Strategies for Parents and Casual Gamers
- Encourage Exploration: Let children select fabrics and embellishments freely.
- Teach Sequencing: Show the steps of creating an outfit to develop organizational skills.
- Celebrate Creativity: Praise even small design choices; each photo is a success.
Strategy Table
| Step | Recommended Approach | Key Tip |
|---|---|---|
| Selecting Fabric | Choose colors matching your theme | Pastels or bright hues work well for children’s outfits |
| Adding Patterns | Layer stickers or prints | Keep the design balanced, avoid overcrowding |
| Accessorizing | Add bows, buttons, or hats | Use decorative items sparingly to enhance design |
| Posing & Photography | Position characters naturally | Experiment with frames for appealing photos |
Transition: Once players understand these basics, it’s time for advanced tips and tricks to create professional-looking designs.
Advanced Tips & Tricks
Maximizing Fun and Creativity
- Combine Patterns Thoughtfully: Certain sticker combinations create visually striking results.
- Experiment with Layers: Layering patterns and accessories can produce dynamic, unique designs.
- Plan Photos Before Dressing: Imagine the final photo to ensure your design looks cohesive.
Secrets and Hidden Opportunities
Ever noticed a sticker placement subtly changing the outfit’s overall feel? Strategic placement enhances aesthetics dramatically:
- Balance Accessories: Don’t crowd one area; spread embellishments evenly.
- Use Theme Colors: Stick to a color scheme for professional-looking designs.
- Pose Intuitively: Characters’ poses can highlight favorite design features.
Transition: Beyond strategy, Little Tailor DIY Fashion shines in its storytelling and emotional engagement.
Storytelling: Bring Your Designs to Life
Emotional Engagement
Imagine seeing a boy in a little sailor outfit with perfectly matched shoes or a girl in a glittery dress with a tiny bow. Each outfit tells a story of imagination, patience, and fun. Children feel pride seeing their designs “come to life,” and casual gamers enjoy the stress-free yet rewarding creative process.
Mini-Dialogues and Anecdotes
- “Perfect! The bow completes the dress,” you whisper as a glittery bow settles in place.
- “Hmm… maybe the hat should tilt a little more,” you muse, repositioning accessories.
- A small mistake! “Oops, the stickers are overlapping!”—quickly corrected with a tap or click, turning learning into play.
Storytelling transforms simple drag-and-drop mechanics into an emotionally engaging and memorable experience. Have you ever felt joy from a perfectly balanced outfit? That’s what makes this game captivating.
Transition: With emotional engagement covered, let’s summarize key takeaways and essential strategies for mastering the game.
Key Takeaways and Final Strategies
Bullet-Point Master Tips
- Follow design instructions initially, then experiment freely.
- Balance colors, patterns, and stickers for cohesive outfits.
- Plan your photos before finalizing designs.
- Layer accessories strategically to enhance appearance.
- Encourage creativity—trial-and-error is part of the fun.
- Take your time; patience results in polished, professional-looking designs.
- Celebrate each completed outfit and photo for positive reinforcement.
Mastering Advanced Designs
Higher levels challenge players to coordinate multiple patterns, stickers, and accessories simultaneously. The sense of pride from completing intricate outfits or stunning photo frames adds replay value and satisfaction.
“Did I really design that perfectly?” you’ll think after finishing a layered, sparkling dress. Yes—and the joy is part of the game’s enduring appeal.
Transition: After mastering designs, it’s time to share your fashion creations with the world.
For Your Social: Sharing and Celebrating Wins
Capture Your Fashion Creations
Take screenshots or short videos of your completed outfits. Share designs with friends or social media, and inspire others with your creative flair.
Suggested Hashtags:
- #LittleTailorDIYFashion
- #MiniFashionDesigner
- #CreativeOutfits
- #FashionFun
- #DressUpChallenge
Platforms to Play and Share
Little Tailor DIY Fashion is accessible on multiple devices:
- Mobile (Android & iOS): Tap to select fabrics, stickers, and position characters.
- PC/Tablet: Click and drag for precise control over designs.
For tips on fashion design fundamentals, you can also reference Wikipedia Fashion Design for inspiration on color coordination, layering, and style principles.